
Firebreak Monoco
Overview
(Work in Progress)
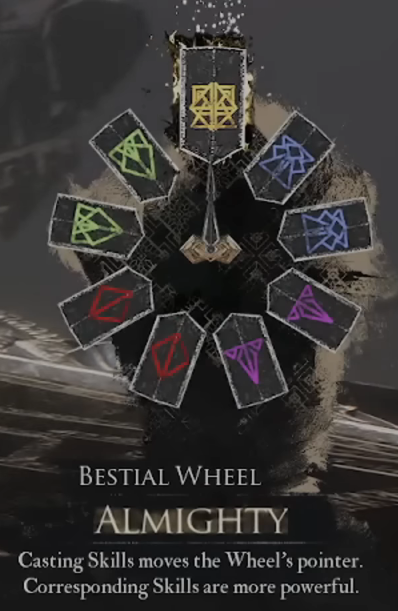
Mask Wheel
Monoco has five masks – Agile, Caster, Heavy, Balanced, and Almighty. Each ability is tied to one of these masks and becomes stronger when used while wearing the matching one. Every ability also spins the mask wheel by a set number of slots. Your primary goal is to land on the Almighty mask as often as possible. Almighty boosts all of Monoco’s abilities and synergizes with several of his best weapons. The core idea is to run a mix of powerful skills with different mask types and spin values so you can rotate into Almighty consistently.
Act 1 & 2
(Work in Progress)
Leveling
|
Level |
Spell/Passive |
|
1 |
Braseleur Smash |
|
2 |
Sakapatate Estoc |
|
3 |
Cruler Barrier |
|
4 |
Ramasseur Bonk |
|
5 |
Portier Crash |
|
6 |
Orphelin Cheers |
Attributes
(Work in Progress)
Act 1 & 2 Luminas
|
Lumina |
Location |
|---|---|
|
Augmented First Strike |
Defeat Lampmaster |
|
Breaker |
Flying Waters – Ontop of Anchor |
|
Breaking Burn |
Esquie’s Nest – Defeat Francois |
|
Burn Affinity |
Ancient Sanctuary – Ultimate Sakipatate |
|
Cheater |
The Continent – Southwest of Old Lumiere |
|
Critical Break |
Monoco’s Station – Grandis Merchant |
|
Critical Burn |
The Continent – Paint Spike West of Isles of Eyes |
|
Dead Energy |
Spring Meadows – Small Cave |
|
Dodger |
Gestral Village – Purchased from Jujubree |
|
Energising Break |
Spring Meadows – Through a Cave |
|
Energising Start I |
Spring Meadows – Defeat Portier |
|
Energising Start II |
Flying Waters – Past the Chromatic Troubadour |
|
Energising Turn |
The Continent – Beach North of Gestral Village |
|
First Offensive |
Stone Wave Cliffs – Near Paintress Shrine Flag |
|
First Strike |
Visages – Sad Path |
|
Fueling Break |
Sirene – Purchase from Klaudiso |
|
Immaculate |
Visages – Boss |
|
In Media Res |
Dark Shores |
|
Inverted Affinity |
Forgotten Battlefield – Trader Kasumi |
|
Teamwork |
Old Lumiere – Merchant Mandelgo |
Weapons
|
Item |
Location |
|---|---|
|
Weapon 1  Ballaro |
Defeat Golgra with Monoco |
|
Weapon 2 Joyaro |
Lampmaster Boss in Flying Manor |
Weapons Overview
The early weapon I like the most for Monoco is the Ballaro. It has solid AP generation early and smoother mask flow; it allows him to act as a solid support character while in act 2 for stronger characters like Lune or Verso while still remaining a threat.
Joyaro is by far and without a doubt Monoco’s best weapon on nearly every build. It starts you in Almighty every fight, grants turn-based damage bonuses when you avoid getting hit (great with shield stacking), and its final upgrade boosts break output. It’s the perfect fit for any Monoco build.
Act 3 Luminas
Pictos Overview
For Pictos use Energy Master, Marking Break and Roulette. These will give you full critical chance and save you a bunch on Lumina cost.
How to Play
(Work in Progress)
Check the links below to browse more of the Best Builds for Clair Obscur: Expedition 33!
Related Builds
Support the Website
Thank you for choosing RPGael!
RPGael is kept ad-free so you can enjoy builds without distractions. If you’d like to support the site, you can donate through Ko-fi or check out the RedGael YouTube channel. Every bit of support helps keeps new content coming!

