Lune Archmage Build Guide - Clair Obscur Expedition 33

Contents
Damage Tank Nightmare

Arcane Warrior Build Guide

The Arcane Warrior is widely considered the strongest build in Dragon Age: Origins. This guide covers everything you need to know — character creation, leveling order, core spells, equipment, and how to unlock both specializations.

The build combines the Arcane Warrior and Blood Mage specializations to create a melee tank that uses Magic instead of Strength to equip heavy armor and weapons, while maintaining access to powerful offensive and crowd control spells. It can be played effectively on all difficulties including Nightmare.

If you’re looking for the most powerful mage build in Dragon Age: Origins, this is it.

  • The only mage build in Dragon Age Origins capable of tanking the entire game on Nightmare difficulty without party support
  • Magic replaces Strength entirely — every point you invest improves your weapon damage, armor eligibility, and spellpower simultaneously
  • Two completely different playstyles across the same playthrough — control mage for the first half, unkillable melee tank for the second
  • Requires a specific encounter in the Brecilian Forest to unlock — missing it locks you out of the specialization for that playthrough
 

The Arcane Warrior starts as a standard mage and transforms into an armored tank capable of soloing the entire game. Your Magic stat replaces Strength for equipping weapons and armor — meaning you wear the heaviest armor in the game while dealing magic-scaled damage and casting spells simultaneously.

The build has two distinct phases. The early game plays like a control mage, using Flame Blast, Glyph of Paralysis, and Fireball to carry you through the first eight or so levels. The late game is entirely different — sword and shield, an unkillable melee tank with a stack of sustained spells running at all times, occasionally unleashing Mana Clash and Blood Wound to clear entire rooms.

Blood Mage is the second specialization and solves the build’s only weakness — mana drain — by letting you spend health instead of mana, keeping your sustained spells active indefinitely.

The build starts slow. The first ten levels feel weak and combat is rough going. It hits its stride after Arcane Warrior unlocks and dominates from level 16 onwards once Blood Mage comes online.

dao best build

Character Creation

1
Character Creation
Elf · 3 Magic · 2 Constitution · Flame Blast · Glyph of Paralysis

Race — Elf (City Elf or Dalish)
The +2 Magic directly increases your spellpower and will eventually determine your weapon damage once Arcane Warrior unlocks. The +2 Dexterity improves your hit chance once you transition to melee. If you want the most thematically fitting origin, Circle Mage pairs naturally with the build.

Attributes — 3 Magic, 2 Constitution
Magic is your single most important stat throughout the entire game — it determines weapon eligibility, armor eligibility, attack damage, and spellpower simultaneously. Never stop investing in it. Constitution covers early survivability and gives you a larger health pool to draw from once Blood Magic activates.

Flame Blast
Your primary damage tool for the first several levels. High AOE damage with a low cooldown. Keep it away from your own party or you will kill them — on Nightmare its AOE is lethal to companions.

Glyph of Paralysis
Your most important early control tool. Places a trap on the ground that paralyzes the first enemy that crosses it. Use it to kite melee enemies, protect yourself from getting surrounded, and lock down priority targets while your party handles the rest.

Combat Training (skill)
Take it at character creation and invest to rank 2 as soon as possible. Reduces spell interruption when hit, improves your melee hit chance, and adds +1 mana regeneration in combat at rank 2 — which contributes directly to keeping Shimmering Shield running in the late game.

Tip:

Elf is the strongest race for this build — +2 Magic and +2 Dexterity directly feed both phases of the playstyle. If you want the most thematically fitting origin, Circle Mage pairs naturally with the build. If you prefer Human then do not worry, the racial stat advantage becomes negligible past level 10 as your Magic investment largely outpaces the starting bonus.

dao best build

Leveling Guide

2
Weakness
2 Magic · 1 Constitution
3
Flaming Weapons
3 Magic
4
Fireball
2 Magic · 1 Constitution
5
Paralyze
3 Magic
6
Rock Armor
3 Constitution
7
Miasma UNLOCK ARCANE WARRIOR
1 Magic · 2 Constitution · Key Milestone
8
Combat Magic
1 Magic · 2 Constitution
9
Mana Drain
1 Magic · 2 Willpower
10
Mana Cleanse
1 Magic · 1 Constitution
11
Spell Might
3 Willpower
12
Mana Clash
1 Magic · 2 Willpower
13
Aura of Might
1 Magic · 2 Constitution
14
Shimmering Shield
2 Magic · 1 Constitution
15
Blood Magic UNLOCK BLOOD MAGE
2 Magic · 1 Constitution · Key Milestone
16
Blood Sacrifice
1 Magic · 2 Willpower
17
Blood Wound
2 Magic · 1 Constitution
18
Heroic Offense
1 Magic · 2 Constitution
19
Heroic Aura
1 Magic · 2 Willpower
20
Heroic Defense
1 Magic · 2 Constitution
21
Haste
2 Magic · 1 Willpower
22
Spell Wisp
3 Magic

Core Spells

Always active (sustained):

  • Miasma — slows enemies that approach, generates more threat per tick than a warrior’s best options. Reactivate every time you enter a new map — it doesn’t persist between areas.
  • Rock Armor — increases armor rating significantly
  • Combat Magic — allows melee attacks to use spellpower instead of strength, essential from level 8 onwards
  • Shimmering Shield — massive defensive buff but heavy mana drain. Don’t activate it until you have sufficient mana regeneration gear or it will drain you dry mid-fight. Near-permanent uptime is achievable with the Cailan’s Arms set.
  • Spell Might — increases spellpower, improves everything
  • Haste — attack speed boost, stack with a second mage if possible
  • Spell Wisp — low upkeep cost, improves all aspects of the build


Activated when needed:

  • Mana Clash — instantly destroys any mage in the backline. Get this before the Circle Tower.
  • Blood Wound — massive AOE damage that also stuns. Combine with Glyph of Paralysis for total crowd control.
  • Glyph of Paralysis — primary control tool throughout the entire game
  • Fireball — backline damage against archers and mages in early game

Early Game Playstyle (Levels 1-7)

You are a control mage. Stay at range, kite enemies with Glyph of Paralysis, deal damage with Flame Blast and Fireball. Do not engage melee — you will die.

Priority targets are always mages and archers in the backline. Fireball them before they can act. Use Glyph of Paralysis on anything that reaches your frontline. Never use AOE spells near your own party on Nightmare — Flame Blast and Fireball will kill your companions.

dao best build

Mid And Late Game Playstyle (Levels 8+)

Once Combat Magic is active you can start fighting in melee with your weapon drawn. Activate all sustained spells before engaging — Miasma, Rock Armor, Combat Magic as a minimum. Add Shimmering Shield once your mana regeneration gear supports it.

The combat loop from here is straightforward: enter combat with all sustained spells running, use Mana Clash on any mage immediately, throw Blood Wound into grouped enemies, let Glyph of Paralysis handle anything that survives. Your companions exist to clean up.

You are the tank. Position yourself in the middle of every other fight and let enemies come to you. Sword and shield is the default recommendation. Cailan’s Shield combined with Maric’s Blade from the Return to Ostagar DLC gives a set bonus that largely covers Shimmering Shield’s mana drain, allowing near-permanent uptime. Two swords is a viable alternative for higher offensive output at the cost of survivability.

Tip:

Templars can dispel all your sustained buffs in a single ability. Without them active you lose most of your damage and survivability simultaneously. Always identify and eliminate Templars before engaging the rest of a fight.

dao best build

Equipment

Weapon
Boots
dao wades boots

Wade's Superior Heavy Dragonscale Boots

Shield
cailans shield dao

Cailan's Shield

Ring 1
dao best ring

Lifegiver

Helmet
Helm_of_honnleath

Helm of Honnleath

Ring 2
key to the city dao

Key to the City

Armor
evon the greats mail dao

Evon the Great's Mail

Amulet
spellward dao

The Spellward

Gloves
dao_gloves_heavy

Wade's Superior Heavy Dragonscale Gauntlets

Belt
andruils blessing dao

Andruil's Blessing

Weapon
spellweaver dao

Spellweaver

Shield
fade wall dao

Fade Wall

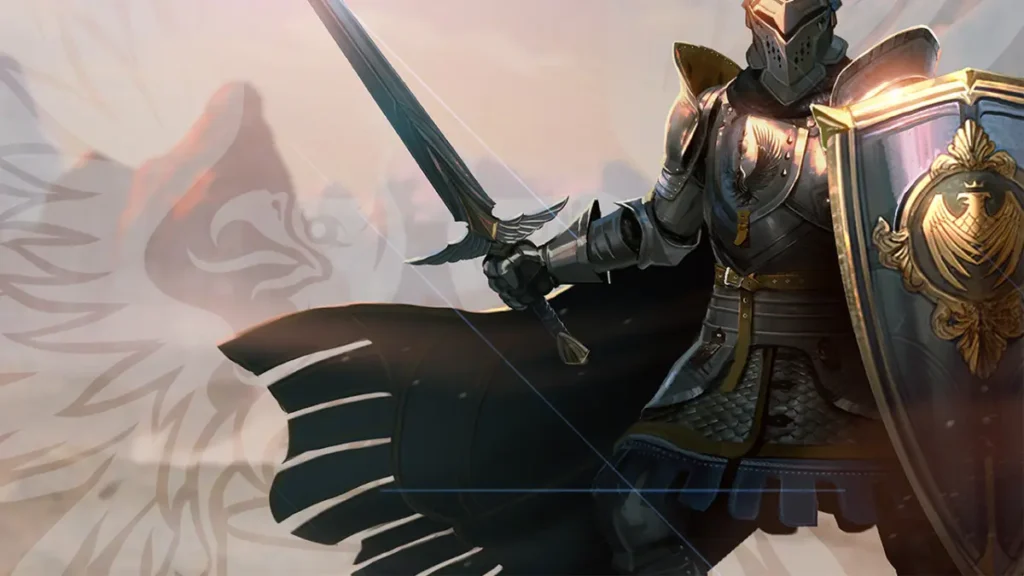
Weapon — Maric’s Blade The primary reason to use this is the set bonus with Cailan’s Shield — together they provide +5.75 mana regeneration in combat which is the single biggest contributor to keeping Shimmering Shield active indefinitely. The blade itself also has strong base stats for a mage weapon. This is from the Return to Ostagar DLC.

Shield — Cailan’s Shield Pairs with Maric’s Blade for the mana regen set bonus. Without this combination Shimmering Shield will drain your mana dry in any extended fight. Non-negotiable if you own the DLC.

Armor — Evon the Great’s Mail One of the best non-DLC heavy armor options in the game. Provides +1 mana regeneration in combat and strong armor rating. Available from the Denerim Market for 107 gold relatively early in the game.

Gloves and Boots — Wade’s Superior Heavy Dragonscale Wade’s Emporium in Denerim sells these once you bring him the right materials. The Superior versions provide the best combination of armor rating and mana regeneration of any craftable set in the game.

Helmet — Helm of Honnleath Stone Prisoner DLC. Strong stats and one of the few helmets that doesn’t actively hurt your mana pool.

Rings — Lifegiver and Key to the City Lifegiver provides health regeneration which keeps you topped up between Blood Magic casts. Key to the City adds Constitution which shores up your health pool.

Amulet — The Spellward Boosts spellpower and provides spell resistance. Both directly benefit the build — more spellpower means more damage from melee attacks through Combat Magic, and spell resistance keeps you alive against mage-heavy encounters.

Belt — Andruil’s Blessing +2 mana regeneration in combat. Every point of mana regen matters for this build and this is one of the easiest to obtain early.

Tip:

Don't own Return to Ostagar? Replace Maric's Blade and Cailan's Shield with Spellweaver and Fade Wall. The Warden Commander Set from Soldier's Peak is also a strong early-midgame armor option until you can access Wade's Emporium.

How to Unlock arcane warrior

In the Lower Ruins of the Brecilian Forest, head to the north-east section of the map and look for a dead-end corridor to the west. Inside a small ruined library chamber with a Broken Stone Altar, find the phylactery hidden in the far right corner beside a headless statue. It’s easy to miss — scan the area carefully.

Touch the phylactery and you’ll experience the memories of an ancient elven arcane warrior trapped inside it. It offers to teach you the specialization in exchange for placing the phylactery on the nearby altar. Accept, place it, and the Arcane Warrior specialization is yours along with 250 XP.

Rush this as a priority — getting Arcane Warrior at level 7 or 8 is the turning point the entire build is built around.

How to Unlock blood mage

Option 1 — Redcliffe (main game): During the Arl of Redcliffe quest, enter the Fade as a mage Warden to confront the desire demon possessing Connor. At the end of the encounter, choose to converse with the demon and strike a deal — one of the rewards available is the Blood Mage specialization. If you want the specialization without the negative story consequences, save before the confrontation, take the deal, then reload and play it out properly. The unlock carries over to your account permanently.

Option 2 — Awakening DLC: Purchase the Blood Mage manual from the bartender at The Crown and Lion tavern in the City of Amaranthine. Available early in Awakening and costs 6 gold.

Conclusion

The Arcane Warrior is the closest Dragon Age Origins gets to a broken build. It asks for patience through a rough early game and one specific detour to the Brecilian Forest — past that it dominates everything the game throws at it. If you want a character that tanks, deals damage, and controls the battlefield all at once, there is nothing better in the game.

Want to see the build in action? Watch the full video below.

Sacrifice Sciel

Damage Combo

Berserker Verso

Damage low hp

Gambler Monoco

Damage Combo

Tsunami Lune

healer ap generator
About RPGael

RedGael is a YouTube creator dedicated to delivering the best builds, guides, and analysis for RPG fans everywhere. For more than 20 years, Gael has lived inside RPGs – starting in the depths of the Deep Roads to the views aboard The Normandy – while testing the systems, breaking the mechanics, and crafting the clearest, most powerful guides possible for fellow enthusiasts.

Gael loves all forms of gaming, especially the challenge of tough boss fights and high-pressure competitive games. His favorite titles span the genre’s history, from classics like Dragon Age: Origins to modern standouts such as SekiroRogue Trader, and Clair Obscur: Expedition 33. No matter the game, Gael brings deep knowledge, experience, and a passion for helping players get the most out of every adventure.

Thank you for choosing RPGael!
RPGael is kept ad-free so you can enjoy builds without distractions. If you’d like to support the site, you can donate through Ko-fi or check out the RedGael YouTube channel. Every bit of support helps keeps new content coming!